
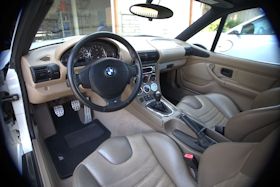
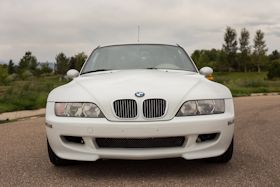
This project coupe is just about complete, and it came out better than even my high expectations. I'm probably most excited about the interior. If you remember, there was once a torn seat bolster, worn out seat bottom, disintegrating floor mats, sagging glove box, cheap chrome touch points, and a broken stereo. No more!
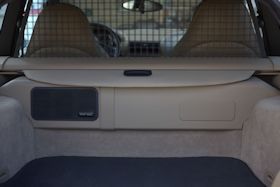
 In the previous article I had fixed the glove box and replaced the shift knob and hand brake handle, but had not yet solved the riddle of the aftermarket audio. The rear speakers were still not working. I called in some outside help from my cousin Peter who helped me install a big subwoofer in the trunk of my Nissan Sentra way back when. He had the brilliant idea to grab a speaker from my surround sound in the house and wire it in place of the rear speakers to see if any sound was actually getting to them. It was; the rear speakers were shot. Removing the rear speaker covers was surprisingly difficult (why I hadn't yet done it). You have to pull hard enough that you feel like the cover may snap or the headliner may come down with it, but all was well. I was surprised to find puny HK speakers up their though. The rubber cones were completely rotted through such that the outside of them was unattached to the base plate. Time for new speakers. We ran to Best Buy and found a set of Pioneer 5.25" speakers that were not as embarrassingly small but bolted right in and sound great.
 The stock beige floor mats were in pretty rough shape when the coupe arrived. It was obvious they had seen all 88,500 miles the coupe had traveled. They were also the style that had small plastic locks to hold them in place only some of the locks were pulling through the carpet and not doing much good anymore. I was very excited to come across a set of black OEM ///M floor mats on Bimmerforums which drastically change the look of the interior by adding a little more contrast to the beige. Rick then found us a matching OEM hatch mat at a local parts supplier and all the carpets are now protected.
Pretty much every coupe I've come across with over 50,000 miles (and some with less) has had quite a bit of wear on the driver seat bolster. The bolster on this coupe was worn all the way through and took some of the foam beneath with it too. I asked around town about upholstery shops and 100% of the responses pointed me to Jerry's Upholstery (which is now Stitch Masters). The owner was very nice and gave me a couple options. He could replace just the bolster with a matching piece of leather or else buy a whole new cover for the seat. He introduced me to a company out there that specializes in replica seat covers for German cars. Z3Ms were in their catalog. Good to know! He recommended just replacing the seat bolster for this project as he gave me the name of another local guy who could fix the rest of the wear to look like new. I was a little bit skeptical given the ostrich pattern of the seat inserts, but went with his suggestion. Amazingly to me, in just a couple hours, the coupe had a new seat bolster with a nice, firm foam pad underneath.
Before and After
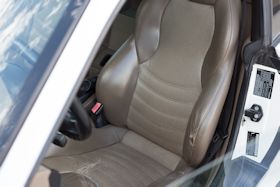

Now the bolster was repaired, but the rest of the seat was still worn out. The worst wear was across the seat bottom including a large portion of it within the ostrich insert. Could it really be repaired? Let me introduce "The Leather Doctor". Marshall runs his business out of his home but does a lot of work for local dealerships too. He has his own mixture including a clearcoat that he tints to match existing leather and painstakingly applies. When we came back to pick up the coupe later that afternoon, I was blown away by the results. He had hand "painted" dots to match the ostrich pattern, and it's nearly impossible to tell where the wear had even been. He went above and beyond by touching up the "boomerang" piece of the center console as well as various fingernail scratches and nicks throughout. Wow!
It was finally time to deal with all the little stuff. First up was replacing the terrible hood roundel and faded badge stickers. As all the exterior ///M badges were S54-style curved badges, they were all replaced at some point in the past. At least they got the rear badge in the correct, S52 location. I ordered new stickers from Never Done Garage, and they worked great as advertised.
Before and After
I then moved onto the door handle gaskets. The originals were cracking and the dealer only sells them in combination with the door handles themselves. Lucky for use we share door handles with all E36 3-series so there are many aftermarket options available. With the right tools, it's a fairly easy job. The most important tool is a small hook to release and re-lock the door handles. I used these two guides for the project: www.roadstersolutions.com/media/PDF/Z3DoorHandleTrimSurround.pdf and forums.bimmerforums.com/forum/showthread.php?1273400-DIY-Door-Handle-Trim-Replacement.
So that is the story of the fourth project coupe. It's been the largest project, but also the most rewarding. It's gone from a coupe I was somewhat embarrassed to bring to Cars & Coffee to one that is a little hard to let go. I loved alpine white coupes before, I love them even more now. I was not a fan of beige interior before, but I certainly am now. It's time for it to find a good new home though. If you have any questions or want to come see it in person, you can email me at jon@mcoupebuyersguide.com. To see the listing, click here. Thanks for following the progress and stay tuned for our next project.