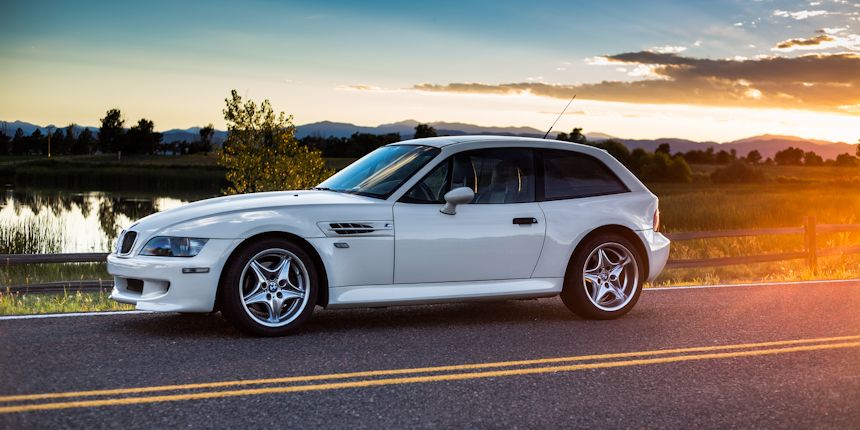
As noted in Part 1, this project coupe has been our biggest project yet. It has also been one of the most fun because of it. It's not quite done yet, but it's been awesome seeing it be completely transformed.
 When I first picked the coupe up from Alex's, I stopped at the local Cars & Coffee on the way home. To be honest, I was a little bit embarrassed to show up in it with the dented hood, peeling wheels, torn seat bolster, sagging glove box, a radio hanging out of the dash, and riding on snow tires in July. I was also afraid I'd stall it in front of hundreds of car guys because the clutch feel was so terrible. Now it's posing for photos worthy of posterizing and is as fun to drive as any coupe I've ever driven. How'd it get from there to here?
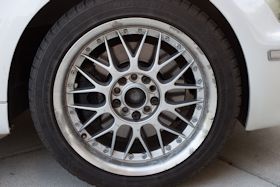 The first order of business was getting it back on proper wheels and tires. We acquired a used set of original hypersilver roadstars and mounted brand new Hankook Ventus V12 tires on them. Not only was the handling transformed and the looks improved, but we lost all the winter tire noise when driving on the interstate. The wheels didn't come with center caps, so I scavenged my own roadstar center caps I had sitting in the garage.
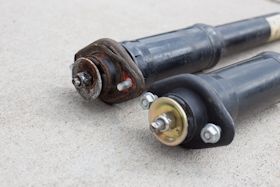
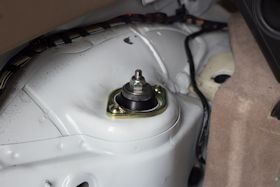
Speaking of scavenging, after getting the new tires on, it became apparent that the rear shocks were on their way out. Since I had the hatch taken apart anyway (more on that later), I decided replacement was in order. My original, low mileage suspension has been sitting in my garage for a couple years, so I decided to just snag my own shocks. To save the future owner from ever having to disassemble the 29 trim pieces in the hatch again, I installed some Rogue Engineering rear shock mounts that allow removal of the rear shocks from the wheel well. You're welcome.
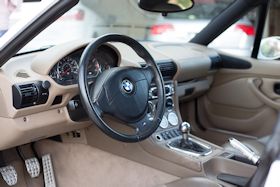 I decided to address the interior next. I replaced the chrome shift knob with my favorite OEM ZHP shift knob and the shiny AC Schnitzer hand brake with a stock one to tone down the interior a little. I went through every inch of the interior and made a very long list of missing and broken bits and pieces. When the aftermarket audio was installed, they must have disassembled everything and weren't as worried about the reassembly. I found loose screws, nuts, caps, and trim buttons all over the place.
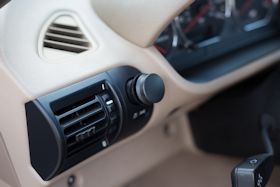
The funniest issue had to do with the odd looking headlight pull and the missing DC outlet plug. It turns out he outlet plug was "plugged' into the end of the headlight pull. I put the outlet plug back where it should be and replaced the missing headlight pull cap with a new one.
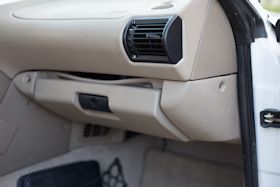
The glove box was about the saggiest one I've seen. The entire panel was also only being held on by two screws too (rather than the usual 6). I installed a glove box fit kit I bought from a Bimmerforums member, and it somewhat surprisingly straightened it out just fine. I then reinstalled it with new screws I ordered from the dealer, so it's nice and secure now.
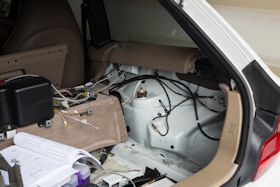 The largest and still ongoing project has been the aftermarket audio. It has a nice Eclipse headunit, Phoenix Gold amplifier, and Monster cables, but it wasn't quite working right. The power to the amp was loose under the hood and would cut in and out. I traced all the cables, secured all connections and took apart most of the interior in the process. The two home-built crossovers mentioned in Part 1 were below the rear hatch carpet and actually sounded pretty good most of the time. A couple connections had come unsoldered though and in the end I removed the circuit boards all together. While the hatch was disassembled, I also noticed the subwoofer and rear speakers were not only not working but not even connected. They have been rewired, but I'm still trouble shooting the roof speakers.
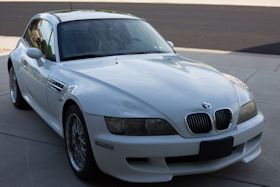
Once I got the interior mostly back together it was time to address the biggest eyesore, the dented hood. The car has never been in an accident, but something heavy was dropped on the hood right above the passenger headlight. I took it to local Custom Design Paint and Body who were able to hammer out most of the dent then repainted the hood. While they were at it, I also had them fix and repaint the scraped and chipped front bumper and polish and coat the very clouded headlights. When I picked it up, the front end literally looks as good as new (after the addition of a new hood roundel).
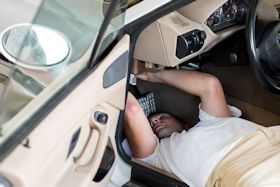 Now that it looked great, it was time to make it drive just as nice. The engine had always pulled strongly, the brakes were recently redone, but, as mentioned earlier, the clutch felt terrible. It engaged high and seemingly inconsistently. I had a number of people drive it and most concluded it was an issue with the pedal movement and not the clutch itself. I did a little more research and ended up ordering some clutch bushings and clutch stop from Rogue Engineering. There was an enormous amount of side-to-side slop in the clutch pedal movement, and the new bushings cured it completely. It was not a very fun project working upside-down underneath the dash, but combined with the clutch stop they helped the clutch engage consistently with a consistent feel. The coupe is fun to drive once again.
The remaining projects are finishing sorting out the audio, having an upholstery shop replace the side bolster, a "leather doctor" touch-up the rest of the seat wear, and a couple preventative maintenance items. Stay tuned.
Project References
Hatch Disassembly and RSM
http://www.ex-parrot.com/pdw/mcoupe/rsm.html
http://www94.homepage.villanova.edu/francis.mcfadden/Installing_Rogue_Engineering_Rear_Shock_Mounts_Roadster.pdf
Glovebox Fix
http://www.waycoolinc.com/z3/06/042906/fixit2006/glovebox/glovebox.html
http://www.zeleznik-klein.com/z3/gloveboxrattle/gloveboxrattle.htm
Clutch Pedal Bushings
http://forums.bimmerforums.com/forum/showthread.php?2029914-Clutch-Pedal-Bushings-Install
http://forums.bimmerforums.com/forum/showthread.php?403056-Clutch-pedal-bushings-DIY-E36
