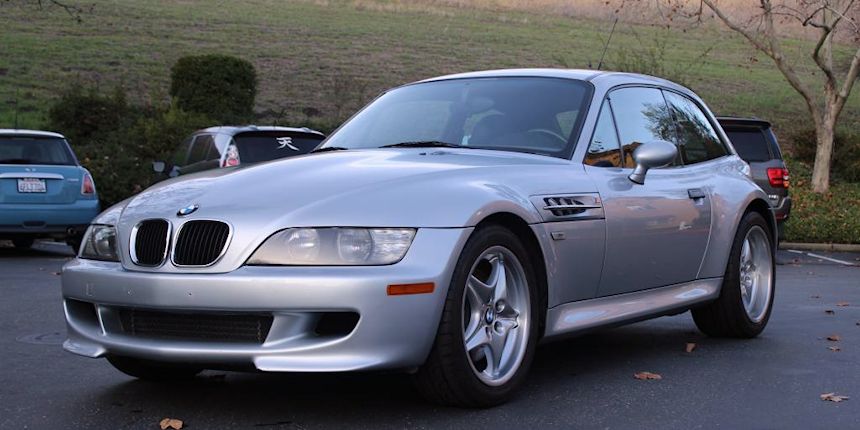
It's time to update you on the status of our project coupe! Once I got the coupe to San Ramon after a long spirited drive, I called Performance Technic to schedule an appointment for an overall inspection. They were booked for another couple weeks, so I figured I'd tackle what I could on my own before bringing it into the shop for the bigger projects.
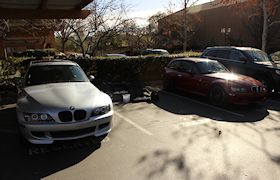
After some discussion with Jon and Rick, we concluded that a major objective with this coupe would be to return the exterior to 100% stock appearance to maximize the appeal for the future owner. I look at a stock appearance as sort of a "blank canvas" that the new owner can modify how he/she sees fit without being distracted by the previous owner's modifications. It can be more difficult to sell even a slightly modified car because a prospective buyer sees too much of the previous owner's taste and cannot visualize how it might look without the mods. It's a similar concept to staging your home when you're trying to sell it, so the buyers can imagine themselves living there. When the car is already modified, it feels very personalized to the current owner and makes it hard for the prospective buyer to imagine themselves in the car. With that in mind, there were several aesthetic items that I could do myself to bring it back to stock appearance.
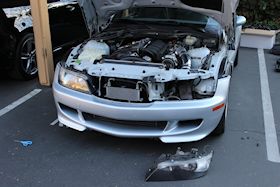
First, the aftermarket Sonar projector headlights would need to be replaced by the original stock headlights. Luckily they were included with the car and were in great shape with all mounting tabs intact! While I still had the stock headlights off the car, I used a Meguiar's Headlight Restoration Kit on each lens to smooth and clear them up as much as possible. Once I eliminated some minor surface scratches and yellow grime, it was time to get them installed. Removal of the Sonars was pretty straightforward. I disconnected each cable socket, and removed the 2 front facing hex bolts from the mounting tabs with a socket wrench. Once those were removed, I still had 2 more hex bolts mounted at base behind the light. These are tricky to get to without a long socket extender. I was able to squeeze a hex adapted screw driver into position and slowly but surely remove them. I had to bail myself out with an extendable magnet because I lost a few of the bolts and they landed in the front bumper area. With all hex bolts removed and cables disconnected, the headlights slid out easily.
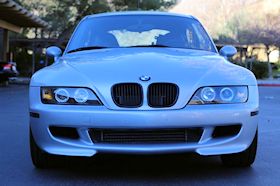
 Installing the stock lights is as simple as hooking up the cables and screwing the bolts back in, but you should be careful to properly level the headlights when mounting. They won't necessarily mount centered, so you could end up with a cross-eyed coupe. You want to make sure they're pointing in the same focal point to properly illuminate the road ahead. To start, I aligned the front of each lens with the parallel ridge on the bumper. I checked my other coupe and Haig's Imola coupe to see how deep or flush the headlights were mounted, and it looked like they were mounted about 1/8" deep from that ridge. With the lights loosely in place, I turned the car on to make sure they each properly illuminated. Turn signals worked properly and both beams worked great. I turned the coupe toward a wall and it looked like both lights were pointing into the same target spot, so there wasn't much additional adjusting necessary. I played around with the placement of the lights a bit more, made sure the focal point was as small as possible, and tightened the hex bolts down and was finished!
Now that the coupe’s original eyes were installed, I quickly swapped out the smoked corner and side markers for the original amber/clear ones. For those unfamiliar with the process, the corner lights are held in place with metal spring clasps. You simply slide the light forward (toward the front of the bumper) and pull the back of the light outward. I twisted the bulb enclosure a quarter-turn to separate it, inserted it into the amber light, and reinstalled. It's good to make sure you hang onto the bulb carefully because the wires can sometimes be short/tight and if you accidentally let go it'll fall back into the front bumper and is difficult to access again. The side markers are removed in similar fashion by pushing it toward the rear of the car. This frees up the tension clip and allows you to lift it free. The bulb is removed with a quick quarter turn, and voila I had original corner and side markers!
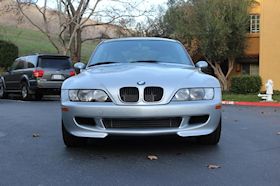
The only other modification on the front of the coupe was a set of black kidney grills in place of the original chrome rimmed ones. With the small dent pushing in the metel between the grill openings, the grills weren’t 100% secured, so I thought I’d remove them prior to getting the dent fixed. The kidney grills are made up of two mating pieces sandwiched together with interlocking clips. The entire assembly can then be pressed in from the front opening and should snap into place. Removal simply requires a flat head screwdriver to unlatch the clips holding them in place from the underside of the hood. Aftermarket kidney grill clips don't have as much resistance as the OEM clips and will break easily. I know this now from experience! Once the PDR is complete on the front of the hood, I’ll re-install the original kidney grills in place.
With the front of the coupe back to stock appearance, the only thing left to do myself was reassemble the gutted rear hatch.
 I had heard that removing these panels takes way longer than reinstalling them, but since I hadn't done either, I figured I'd be at it for a while. Haig came over for the day to help out with the work, so I used his rear hatch for comparison so I could match panel location and screws/fasteners with the proper hole location. What ended up being the biggest challenge was learning the proper order in which to install the panels. I started by installing the large luggage net partition, thinking it wouldn't get in the way of the carpeted pieces at all. Once that was in place, I installed the center cubby plastic piece and the two smaller plastic square pieces on either side. They all fit together nicely, which was satisfying, until I tried to install the plastic subwoofer enclosure. D'oh!
 Out came the cubby and the luggage net partition and in went the black plastic subwoofer/6 cd changer enclosures. They lined up with metal bracket holes and simply snapped into place with some white plastic inserts. I figured I was in good shape and used the original plastic screws (plastic!?) to fasten those pieces in place. The screws were badly stripped…because they were plastic…but I still managed to steadily twist them into place. I figured they were in place for good so it wasn't an issue. But then I tried to install the two side carpeted panels. Oops! The plastic enclosures were designed to be fitted flush against the inner walls of the coupe hatch, which means the carpeted panels needed to be installed BEFORE the enclosures.
Out came the plastic screws, even more badly stripped than before. Out came the subwoofer enclosures with several snaps of the plastic inserts. All tabs intact and no cracks, luckily. Before I could slide the carpeted panels in place, I wrestled with the aged and cracking insulation for quite a while. After 15 years, this stuff is pretty fragile and there were rubber flakes everywhere after twisting and contorting this stuff to fit against the passenger side wall properly. Once I finally got it situated, I trapped it between the carpeted panel and quickly slid it as far forward as I could until it was in the proper spot. Amazingly the insulation on the driver side was in good shape, so the panel went in smoothly. I screwed in the metal spring tie-downs into the body metal on each side, finalizing the installation of both panels. Then I reinstalled the sub enclosure plastic, and then re-reinstalled the center cubby and surrounding plastic bits. I laid the luggage net partition on top and bolted it in place. Phew, everything fit together very well! A couple more carpet panels on either side installed easily with plastic fasteners. The two floor carpet panels went in tightly after the tool-kit was reinstalled, and we now had a fully assembled rear hatch!
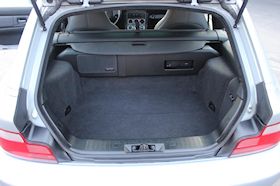
I recently purchased a spare M coupe rear hatch carpet, so I thought it would be the perfect addition to the project coupe. With some vacuuming and carpet brushing, the hatch looks incredible.